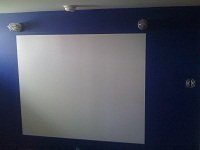
Make your own whiteboard with whiteboard paint.
Whiteboard paint is a creative idea to add to a children’s bedroom. In your office space you may want to create a large wall that can be used as a whiteboard for project development or brainstorming sessions. Whiteboard paint can give you a fully functional board to write on with erasable markers.
Whiteboard paint while not as common as chalkboard paint can be purchased from many paint suppliers. To create a working whiteboard that will allow erasing requires a very smooth hard finished surface. Therefore traditional paints will not do the trick. Whiteboard paint uses two part epoxy technology that dries to a very hard shinny finish. When you purchase whiteboard paint, look for a product that is sold in two separate cans, generally sold as a boxed set. You will combine these two parts just before painting. How much does whiteboard paint cost? You should be able to buy quart size boxed sets for around $20. This amount will cover approximately 90 square feet.
Step 1 - Prepare the surface thoroughly
Preparing a smooth surface is absolutely critical when painting a whiteboard. If you are working with a drywall surface, it is important to skim coat the surface at least once if not twice in preparation. You can read about creating smooth walls here and how to skim coat drywall here. Prime any unprimed surfaces with a good quality white primer. If you are painting over dark painted surfaces, make sure you prime the area first. Most manufacturers recommend two coats of whiteboard paint. This is probably not going to completely cover very dark colors, so it is critical that you use a good quality primer to make sure the surface is nearly white before applying the whiteboard epoxy paint.
Step 2 - Plan your movements carefully
Unlike traditional paint where you can just apply a third and fourth coat as necessary, you will have a limited time to apply the epoxy paint before it begins to harden. Usually, you will need to apply each coat within an hours time and after that you will not be able to touch it unless you want to start the process all over. Therefore, good preparation before beginning to paint is critical. You will want to mentally plan out every step of the process before beginning. Think about things such as, where will you place the used roller covers? What will you use to mix the epoxy? What will you do with the used epoxy stirrers? What direction will the strokes of paint be laid out with, etc?

Step 3 - Mask off the area
Using good quality painters tape, mask off the area that you want to turn into a whiteboard. Look for a good quality masking tape that promises superior seep through protection. Poor quality masking tape tends to allow paint to bleed through the sides leaving uneven edges.
Step 4 - Mix the epoxy
Once everything is ready, mix part A and B of the two part epoxy thoroughly. From the time that you combine the mixture you have approximately two hours to apply two coats so it is important to work quickly. Take care to make a note of the time you started mixing the epoxy and calculate when you need to be done by.
Step 5 - Apply the epoxy
Whiteboard paint can be applied with a roller or brush. Using a good quality 3/8 inch nap roller cover will ensure a smooth surface with minimal texture. Four inch soft woven mini-rollers are a good option if the area you are working on is relatively small. A second coat can be applied after thirty minutes. The first coat may still be slightly tacky however unlike traditional paint it should not smear when applying the second coat.
Step 6 - Remove the tape within 30 minutes and let it cure
Remove any masking tape after thirty minutes of applying the second coat. This ensures that the tape is removed before the epoxy hardens completely. The freshly painted whiteboard should be dry to the touch in six to eight hours depending on temperature and humidity levels. However, it is important to wait a minimum of 3 days before use to allow the paint to cure completely. When drawing on your new whiteboard make sure to use only dry erase markers
Cleanup
If the product you purchased is water based latex epoxy, warm soapy water can be used for basic cleanup. Epoxy dries with the assistance of a chemical reaction so it can be very difficult if not impossible to remove from unwanted areas. Therefore, it may be helpful to use disposable items when applying epoxy paint so you can simply discard them when you are done.
Conclusion
Making a customizable whiteboard for your office, kitchen or children’s room can be a fun project. With whiteboard paint, you can determine the size, placement, and shape of the whiteboard. Of course, every product has specific instructions from the manufacturer. The steps above are meant to serve as a basic guideline in planning your project. You should always refer to the manufacturer for more specifics on the product that you intend to use.

