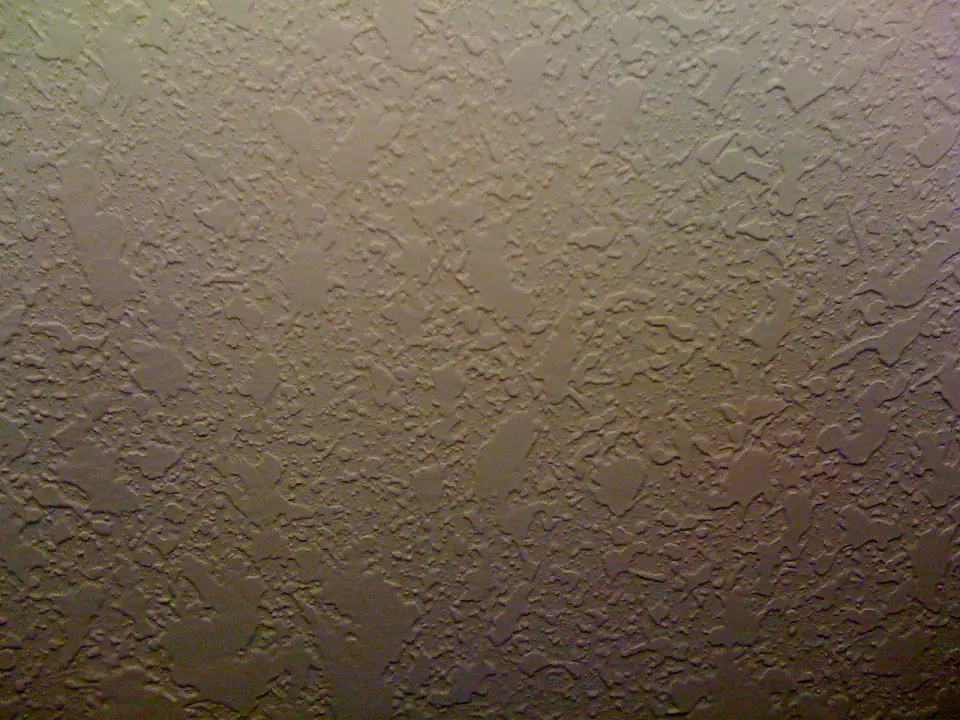
Splatter Knockdown Drywall Texture
Splatter knockdown texture is one of the most popular types of textures across the south and southwest United States. Most people simply refer to this type of texture as Knock Down Texture, Spray Knockdown, or Knockdown Texture.
However, since other types of textures have a knockdown step such as Stomp Knockdown, Splatter Knockdown is a more specific name that helps to differentiate it from other knockdown textures. As described below, this type of texture is splattered on the walls, allowed to set slightly and then knocked down with a large curved knife.
Splatter Knockdown Drywall Texture is often used in hotel rooms where wallpaper is not used. It is also used in residential settings. In recent years in the southwestern region of the U.S., fewer people choose spray or splatter knockdown textures. Instead, hand textures such as Santa Fe and Skip Trowel or even Hawk and Trowel textures have grown in popularity. Around 2010, the midwest saw a surge in the popularity of Splatter Knockdown as a replacement for Smooth Wall.
How to create a Splatter Knockdown Texture?
Overview
To apply splatter knockdown texture, two things are needed: a supply of texture material and compressed air. Texture material is pumped through a hose to a handheld trigger-activated gun. Compressed air is mixed with the texture at this point and the mud and air exit the gun through a small opening.
The volume of texture mud coming from the gun is governed by how hard the operator pulls on the hand trigger. The air pressure is controlled by a separate valve located on the airline, usually mounted on the side of the spray handle.
As the texture material exits the nozzle it separates into many small globules of mud that splatter in random patterns on the drywall surface. These globules are left to set slightly and then smoothed with a large flat knife to produce the knockdown effect.
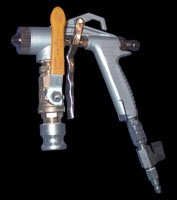
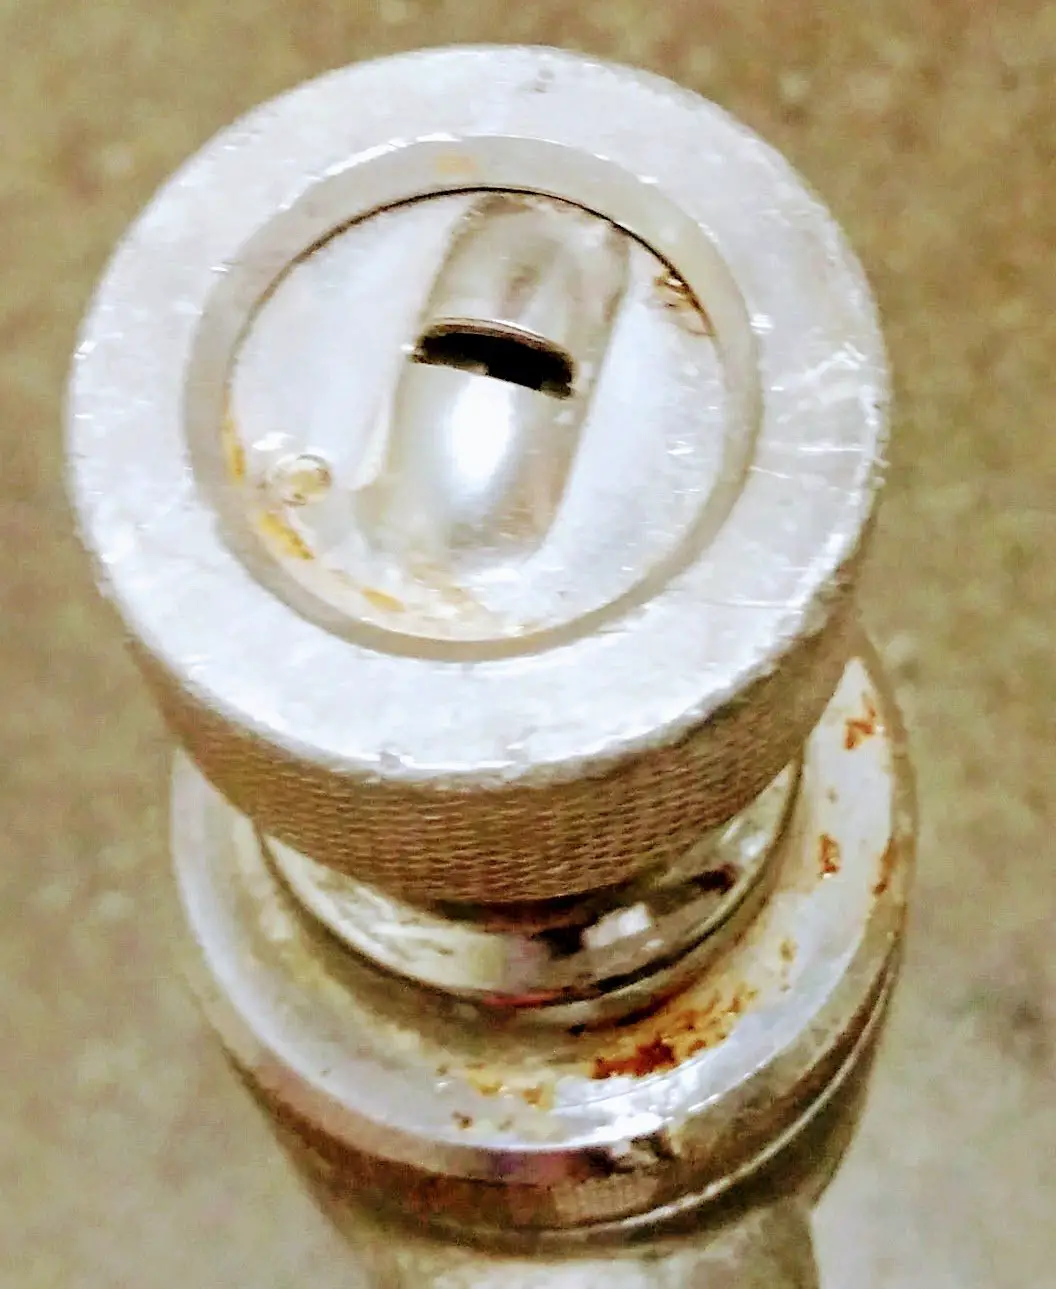
Click on the image below for a larger picture
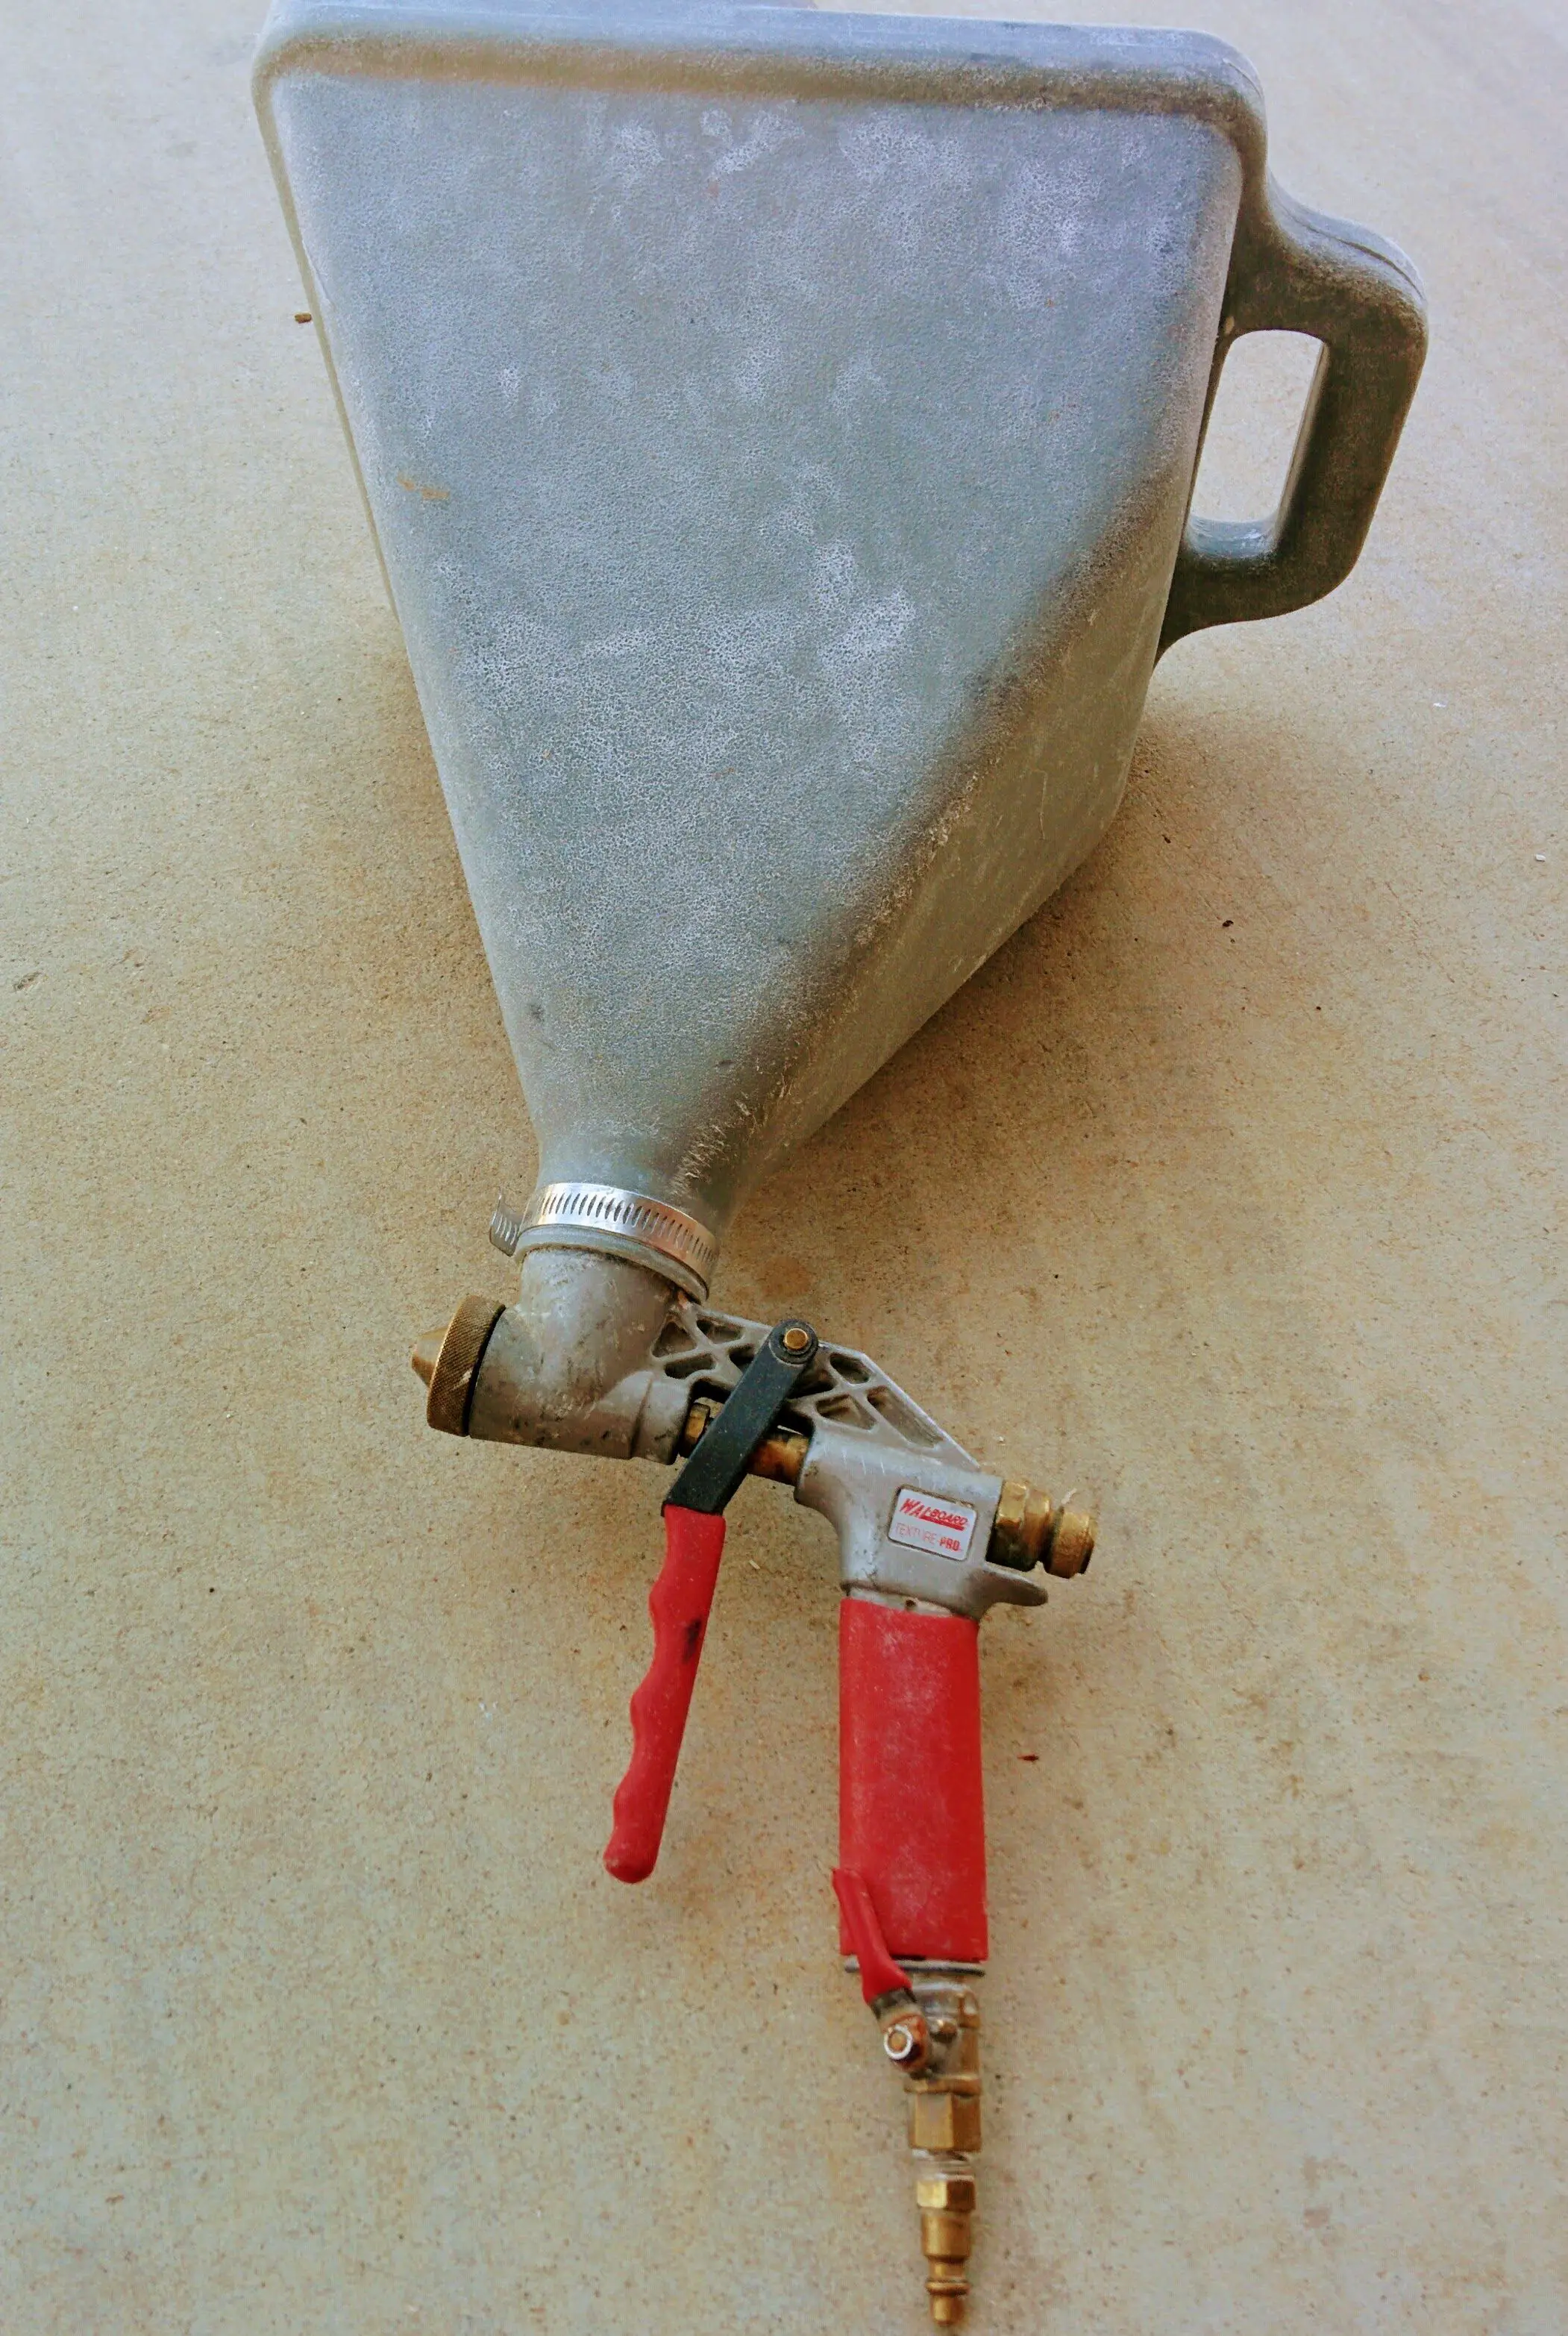
A unique spray gun and nozzle are required to apply splatter knockdown drywall texture. The gun has two tubes entering from the bottom. The large round tube supplies texture material. The smaller tube supplies compressed air.
The large hand trigger on the gun opens the texture material valve so the amount of material sprayed is controlled by how hard this large trigger is pulled. There is usually a small ball valve on the air supply to control the volume of compressed air that is mixed with the texture mud. The pictures below show a knockdown texture spray nozzle and tip.
Step 1 - Prepare the surface
Splatter Knockdown texture requires a very smooth surface. Even though the entire surface is going to be covered with texture, knockdown will not necessarily cover imperfections in seams and butt joints. Make sure the surface is finished to what is considered a level 4 finish.
The seams and butt joints need to be as flat as possible with no tool marks. The one thing knockdown texture may cover is small pockmarks and bubble holes in the drywall mud. While you should try to limit small divots and bubble holes as much as possible, the texture should cover them as long as they are very small.
Step 2 - Mask off areas to reduce cleanup
Spraying a knockdown texture creates quite a mess. Since texture mud exits the end of the gun at high pressure along with compressed air, texture globules end up getting everywhere. The time spent masking off windows, light boxes, and anything else that you don't want texture on will be worth it in the amount of time saved for cleanup.
Step 3 - Mix the texture mud
Knockdown texture mud should be fairly thin in consistency. The viscosity of the mud is one of the factors in the size of splatter blobs created. Thinner mud will usually create smaller blobs, however, the size of the globules is also controlled by the amount of air pressure so you may need to experiment with the thickness of the drywall mud until you find just the right viscosity that can be pumped smoothly through the sprayer and enables the desired size of globules.
Step 4 - Plan your spray route
Once you start spraying texture, you will want to move quickly across the entire project. It is good to take a few minutes to plan out where you will start and how you will progress. Take into consideration air and texture hoses. If not planned carefully, hoses can easily end up damaging the texture that was just sprayed before it has time to dry.
Step 5 - Spray the texture
When everything is ready you can begin to apply texture. It is best to have at least 3 people working together to complete a large job. One person operates the spray gun, the second person minds the hoses and assists in whatever is needed by the gun operator. The third person mixes the texture mud, making sure the supply never runs out. Either the second or third person can also circle back to knock down the texture after it has set slightly.
Step 6 - Knock down the texture
Once the texture has set lightly, use a long-handled curved drywall knife to lightly smooth out the tops of the globules and create the low profile knocked-down look.
It takes practice and experience to know exactly how long to wait before knocking down the texture. If done too soon, the texture will be runny and simply smear. If you wait too long, small dried-out pieces of mud will drag across the surface creating unsightly lines. It also takes practice to know how much pressure to use and how to avoid tool lines.
Step 7 - Allow to dry and remove masking materials
Make sure to wait until the texture is completely dry before removing the masking paper and tape. If removed too soon, it can easily damage the texture.
Step 8 - Lightly sand the texture
Lightly sanding the finished texture with 150-grit sandpaper helps to even out the surface and remove any small tool marks. You want to be careful however not to sand too vigorously. Once it has been sprayed, it is very difficult to match if something goes wrong.

Picture of spray rigs used for various textures
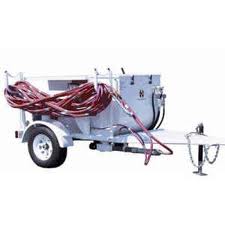
Spray rigs for knockdown texture
Special equipment is required to spray this style of texture. There are different styles of texture sprayers capable of producing the splatter effect. Only gas or diesel-powered spray rigs are well-equipped for professional high-output texture jobs. These spray rigs are mounted on a trailer and have 20 to 25-horsepower engines that power both the air compressor, mixer and spray pump. They have between 150 and 450-gallon tanks for texture material.
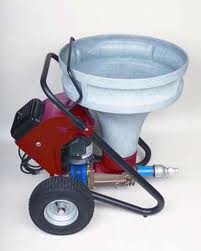
Small portable texture sprayers, while useful for small patches or one-room jobs, simply don't have the capacity, air pressure, or material pump pressure needed for entire houses or larger projects.
Though the basic style of texture is created by the equipment described above, many factors contribute to the variety of splatter knockdown textures available. The size and style of the nozzle tip opening can affect the size of the globs splattered from the nozzle. The thickness of the mud, the air pressure used, as well as how long you wait before knocking it down all play a part in the exact texture produced. Because of these variables, it is very difficult to perfectly match this type of texture when repairing a small patch in the wall.
Splatter knockdown texture is not a good texture to use for remodels or repairs. The process of spraying texture on the walls is very messy. Small globules of mud can get on anything that is not masked off creating a mess to clean up.
A rarely used option for painting knockdown texture
One variation to the splatter knockdown involves adding tint to the texture material before spraying. First, the surface drywall is prepared as normal and then coated with two coats of high-quality primer. Tinting is added to the primer to create a base color. A different color tinting is then added to the texture material. The texture is then sprayed and knocked down as normal.
Once the texture has dried a clear coat of protective finish can be applied to prevent dings or fading. As you can imagine this produces a two-toned effect that accentuates the depth of the texture.
Conclusion
Splatter Knockdown Texture is a good option for new construction. Before deciding on this texture you should consult with local tradesmen to see if they can produce the texture you are looking for. You should always ask to see examples of specific textures that the tradesman has done to assess his abilities.
Another texture though less common but closely related is Orange Peel Texture. It is created with very similar techniques as those used for knockdown.
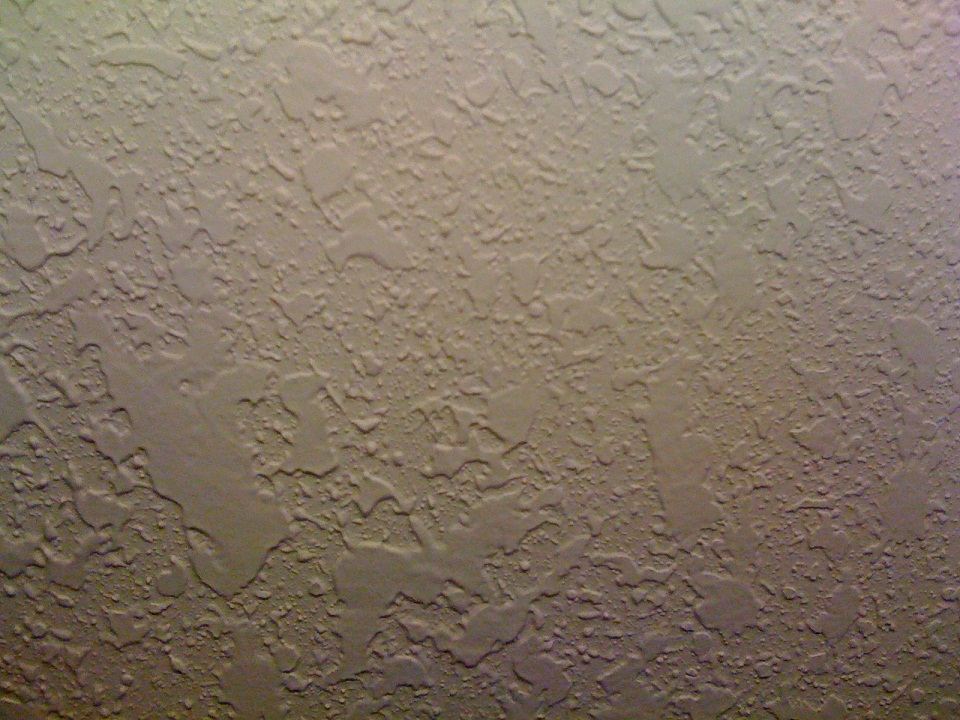
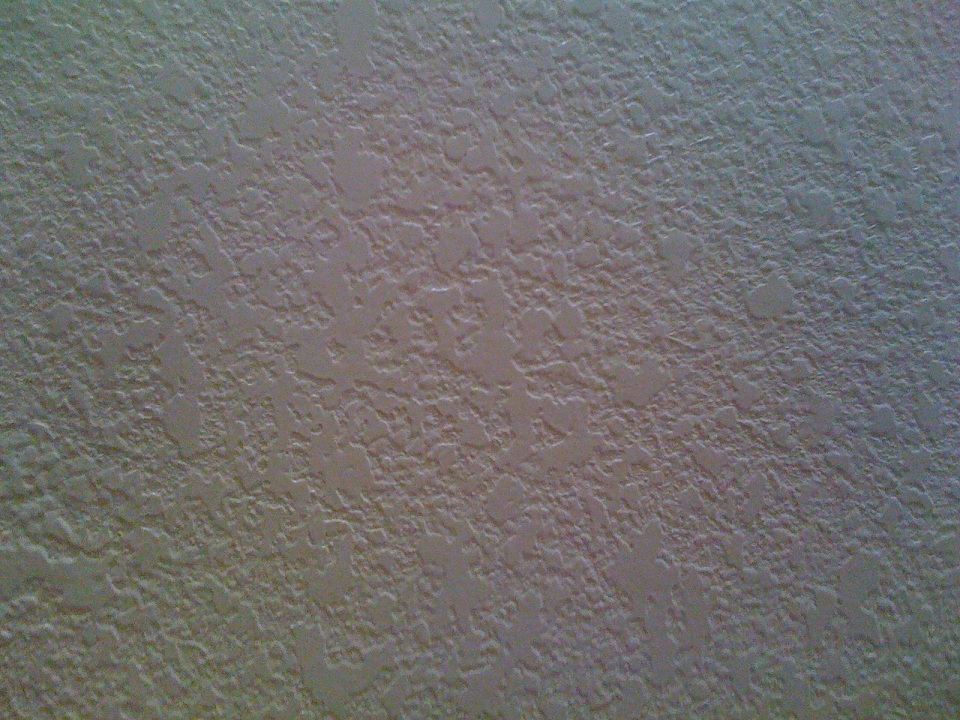
Below are some more examples of splatter knockdown textures