How to Fix Drywall Cracks
Drywall cracks happen for many reasons. Most show up in the first year after construction, but depending on the cause they can appear later as well. Fixing a crack and keeping it that way comes down to three things: stop the movement, tape the crack for strength, and float it out flat. If you don't stop the movement, the crack will come back.
Before you start: is it a drywall problem?
Read the crack first. Cracks that grow, show up in several rooms, run stair-step, or come with sticking doors or sloping floors may be structural, so get them checked before you repair anything. A gap where the ceiling meets an interior wall that opens every winter is usually truss uplift and needs a different fix. Use What Causes Drywall Cracks? Diagnose Before You Repair to match your crack to its cause. If the crack is in plaster rather than drywall, the same techniques mostly apply, but stopping plaster cracks from coming back is harder. See drywall vs plaster.
Tools and materials
- 6-inch drywall knife, plus a 10- or 12-inch knife for finish coats
- Utility knife
- Mud pan
- Drywall screws and a drill/driver with a dimpler or clutch
- Paper drywall tape (or mesh tape, but only with setting-type mud)
- Setting-type (quick set / "hot") joint compound, plus all-purpose or lightweight all-purpose for finish coats
- Sanding sponge or pole sander (fine grit), and a dust mask
- Primer, texture materials if needed, and paint to match
- For a seasonal or recurring crack: flexible inside corner bead (Strait-Flex) or a control joint bead
How to fix a drywall crack, step by step
Step 1: Find and stop the cause
Push on the drywall on both sides of the crack. If it moves, it has to be secured first. If it doesn't move but the crack sits over a header, a long beam or a ceiling/wall corner, the structure is moving, so read Diagnosis before going further.
Step 2: Prep and cut out the old tape
Remove as much of the original loose tape and mud as you can. Peel away every loose piece of tape and cut it back to where it is firmly stuck. Scrape off ridges of mud with a 6-inch knife, taking care not to gouge the drywall paper. Only remove mud and tape that comes off fairly easily.
The new tape is only as good as the layer it covers. If you put new tape and mud over tape that's peeling, the new layer will peel off with the old one. If the original tape is solid, you can tape over it. On a hairline crack with no loose tape, cut a shallow V in the mud with a utility knife giving the new mud something to grab on to.
If you tear the face paper, seal the torn spot with a coat of primer or a sealer made specifically for torn drywall paper before you mud. Skimming drywall mud over drywall paper that has peeled back can cause nasty bubbling which, once started, is very difficult to fix. Zinsser Gardz is a product that we have had success with.
Step 3: Re-secure the drywall
Add drywall screws on both sides of the crack, set back about an inch or two, until nothing moves. Drive the heads just below the surface without breaking the paper. Replace popped fasteners instead of re-driving them (see screw pops). If there's no framing behind the crack, add backing or use a strip-backed patch. Check spacing with the fastener spacing calculator.
Re-securing the board? Check how far apart screws or nails should be with the Fastener Spacing calculator.
Step 4: Choose your tape and mud, then tape the crack
Tape. Opinions differ on what tape to use for crack repair. Some use fiberglass mesh tape. We have found paper tape makes a slightly stronger joint, and since the whole point of taping a crack is to strengthen it, paper tape is our pick. If you do use mesh, bed it in setting-type mud, never premixed. Combining mesh with all-purpose mud is a common reason repairs crack again. Full comparison: mesh vs paper tape.
Mud. All-purpose mud gives paper tape a firm bond and is easy to work with, but it takes many hours to dry before you can re-coat. On a repair you usually don't want to wait, so quick set (setting-type) mud is a good choice. It bonds well, makes a hard surface and doesn't shrink between coats. See types of drywall mud.
Taping. Taping a crack is basically the same as taping any drywall joint (how to tape drywall):
- Spread enough mud over the crack to make a full bed with no bare spots. Repairs make this harder than new work because the surface has more imperfections.
- Press the tape into the mud, centred on the crack.
- Smooth it with a 6-inch knife to flatten and remove extra mud. Don't squeeze out too much; the mud under the tape is what holds it. Don't leave a mound either. The tape should end up smooth and even with, or slightly below, the surrounding surface.
- Let it set or dry before the next coat.
Step 5: Float and finish coats
You have more choices for finish coats than for taping. All-purpose mud works but is harder to sand. Lightweight all-purpose works very well for finishing because it's easy to spread and much easier to sand. The downside of both is that they can take up to 24 hours to dry before re-coating, so a small patch can take several days.
Quick set mud (hot mud) can be used for the finish coats too. It can be re-coated as soon as it sets, so 3–4 coats can go on within a couple of hours, and it doesn't shrink as it sets.
Getting a smooth finish with hot mud
Hot mud tends to be grainy or leave trowel marks that don't show until it's dry. On a textured wall that won't matter, but on a smooth wall it can. Two options:
- Apply the first two coats as normal, then add 2–3 very thin skim coats of hot mud to fill pockmarks and even out trowel marks. The whole repair, taping included, can be done in a few hours.
- Apply the first two coats of hot mud, then finish with a thin coat of lightweight all-purpose. Let it dry overnight before sanding. It covers what the hot mud leaves behind and sands to a smooth finish.
How many coats and how wide? A repaired crack finishes like a butt joint, because the tape sits on the surface instead of in a recessed taper. Float it out at least 12 to 15 inches on each side so it looks flat. Two or three coats may be enough, but if the crack was raised on either side it will take more. Several thin coats are easier to control than a few thick ones. If you're new to this, go thin and add another coat if it isn't flat yet. It is always easier to add more thin coats than to sand off overly thick layers.
Step 6: Sand
Once the last coat is dry, sand lightly with a fine sanding sponge or pole sander, just enough to knock down ridges and blend the edges. Don't sand into the tape. Check it with a light pointing flat against the wall and touch up low spots with a thin coat. For a smooth wall that has to look perfect, see level five drywall finish and how to roll skim drywall.
Step 7: Match the texture and paint
Prime the repair before texture and paint so the mud doesn't flash through the paint. Matching texture takes a mix of imagination and skill. See tips for matching drywall texture and matching knockdown texture. Then read painting drywall repairs, which explains why a touch-up often needs a full wall of paint.
Fixing cracked or bubbling drywall tape
When the tape itself is cracked, lifted or bubbled, the fix is to remove it, not cover it:
- Cut along both edges of the bad tape with a utility knife and peel it back to where the tape is solidly adhered to the surface.
- Scrape off loose mud. Seal any torn paper with primer.
- Check for movement and re-secure the board if necessary.
- Re-tape with a full bed of mud under the tape (step 4), then finish as above.
Tape usually bubbles or lifts because there wasn't enough mud under it, the mud was too dry or too thin, or the surface was extremely dirty. See why drywall seams crack.
Hairline, wide and corner cracks
Hairline cracks
If the board is solid and the tape is sound, open the crack slightly, fill it, tape it with paper tape and feather it out. Caulk or a thick coat of paint may hide a hairline crack for a while, but it usually comes back so taping and finishing is the best way to fix the problem.
Wide cracks or gaps
Fill the gap with setting-type mud first, let it harden, and then tape. If the crack runs through a sheet or the edges are crumbling, cut out the damaged section and patch it. See drywall damage repair methods.
Inside corner cracks
Remove the loose tape, re-secure both sides and re-tape with folded paper tape, coating one side at a time. If the crack is at a ceiling/wall corner and comes back every winter, it's likely a sign of truss uplift. See Diagnosis.
Outside corner cracks
Check the corner bead for loose fasteners or adhesive failure. Re-fasten or replace the bead, then re-coat. See how to coat corner bead.
FAQ
How do you fix a crack in drywall so it doesn't come back?
Stop the movement first by re-securing the board or adding backing, then cut out loose tape, re-tape with paper tape in setting-type mud and float it out wide.
Should I use mesh or paper tape for drywall crack repair?
Paper tape makes a slightly stronger joint, so we use it for cracks. If you use mesh, bed it in setting-type (hot) mud, not premixed.
What mud should I use to fix drywall cracks?
Setting-type (quick set) mud for taping and filling, because it bonds well and doesn't shrink. All-purpose or lightweight all-purpose sands easier for the final coat.
Can I just put mud over a drywall crack?
Mud alone usually cracks again. A crack needs tape for strength. But the board has to be secured first.
How do you fix cracked or bubbling drywall tape?
Cut out the loose tape back to solid tape, scrape off loose mud, re-tape with a full bed of mud, then finish and sand.
How long does it take to fix a drywall crack?
With quick set mud, taping and several coats can be done in a few hours, plus texture and paint. With all-purpose mud, each coat can take up to 24 hours to dry.
Keep reading
California Drywall Patch
The California Drywall Patch is one of the most common ways to repair drywall. Cut the patch 3 inches larger than the hole being repaired. Score the drywall paper and break away the flaps.
The Story of the California Patch
The California Drywall Patch is one of the most common ways to repair drywall. Larry sent in a humorous but possibly believable explanation for the origin of the California Patch. Please enjoy.
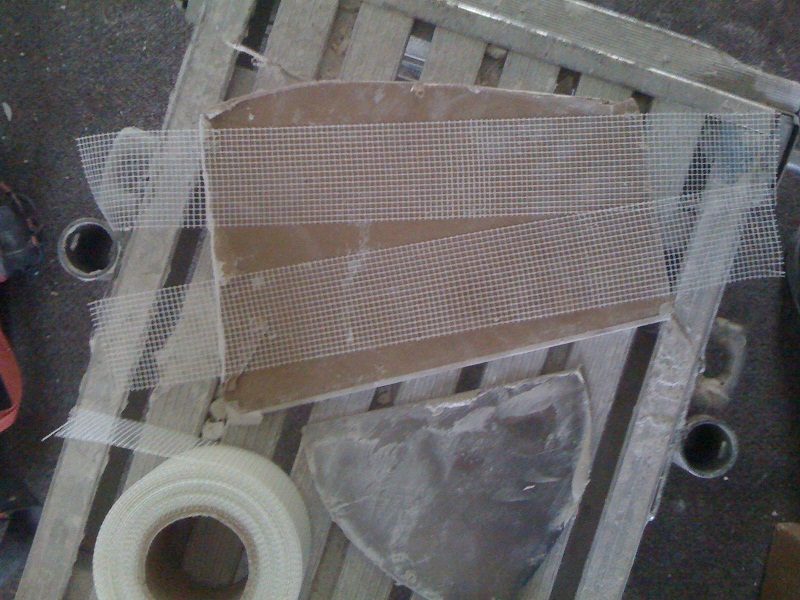
Repairing Drywall Holes with a Hammock / Ohio Patch
Hammock patches are the strongest and easiest method for repairing small to medium holes in drywall. The same drywall that was cut from the wall can be used to replace the area being repaired.
How to Match Existing Knockdown Texture
Matching existing knockdown texture is the hardest part of a drywall repair. Skip knocking it down if you want the patch to blend.