How to Tape Drywall Angles
Taping drywall angles is very similar to taping flat seams. The primary goal is to spread sufficient drywall compound evenly on both sides of the joint so that when you set the drywall tape in place, it will securely hold. As with taping flat seams, if even a very small area of drywall tape is not embedded with enough drywall mud, bubbling can occur which looks bad and weakens the joint. Fiberglass mesh drywall tape should never be used to tape drywall angles. Fiberglass mesh tape does not bend crisply for creating strong and clean inside angles.
Taping Angles by Hand
It is possible to tape drywall angles with only a drywall pan and six inch knife. Without specialized tools, it can take at least twice as long to tape drywall angles as flat seams. As with taping flat seams, you should always use all purpose drywall compound rather than topping or lightweight drywall mud. The drywall mud should be thinned a little more than normal. Newer drywall finishers tend not to add enough water when thinning mud so go ahead and add a little extra water until you begin to feel comfortable with the consistency.
To begin, scoop drywall mud onto one corner of the six inch drywall knife. Run this bead of mud down one side of the angel to lay an even coat of mud. To cover an 8 foot angle, you may need to refill your knife at least twice. After you have covered one side of the angle, do the same on the opposite side. You may find that placing a sufficient amount of drywall mud on the corner of the knife is much more effective than using the top of the knife. The curved design of a six inch knife makes it easy to run the edge along the angle.

Once you have thoroughly coated both sides of the angle, take paper drywall tape and fold it in half between your fingers.You will notice that paper drywall tape is made with an indentation in the center running the length of the roll. This indentation makes it easier to fold the tape crisply in preparation for placing it in the angle. Once you have folded a few feet of the drywall tape, you can begin to place it in the corner embedding it in the drywall mud. You may want to use your six inch drywall knife to guide the fold of the paper into the center of the angle. Don’t be afraid to get your fingers in the drywall mud. An experienced taper eventually learns how to do the job while staying relatively clean however, if you are just starting out, it is impossible not to get drywall mud all over yourself. When placing the tape in the corner, focus on placing the fold squarely in the center along the entire length of the angle.
After the paper tape has been set squarely in the angle you can begin using your six inch knife to smooth excess drywall mud from behind the tape and securely embed the paper in place. It is generally good to begin somewhere toward the middle of the angle and work your way toward the top or bottom. Using the corner and edge of the six inch knife, gently smooth-out one side of the angle at a time. You must be careful not to allow the sharp corner of the drywall knife to cut a hole in your freshly laid paper tape. Again, the curve of the six inch knife should help you to run along the inside of the corner. You may need to rock the knife along the curve in or out to find the perfect balance of creating a crisp square corner and not cutting the drywall tape. If the drywall mud was not thinned enough, it will be more difficult to smooth out evenly.
To coat the angles after they have been taped, you must coat one side at a time and allow it to dry before attempting to coat the other side. Here again the curve of a six inch knife comes in handy for creating a crisp square angle.
Specialized Tools for Taping Inside Angles
Taping angles by hand is tedious work. Automatic taping tools can be expensive but well worth the investment if you are planning on taping more than one project. If you are just thinking about investing in professional automatic taping tools, but cannot spring for an entire set of everything, angle tools should be your first consideration
The following two basic tools are used when taping inside angles:
- Angle Roller with pole
- Angle Head (plow) with pole
- Donut Roller
A good Angle Roller will cost $100 - $200. An angle head will cost upwards of $300. Good poles for each tool will cost around $100 so the total investment for just these basic angle tools is from $500 to $600. The amount of time saved using an angle roller and plow will quickly pay for itself. These two tools easily provide the greatest return on investment of all the automatic taping tools. Because of this, these two tools are considered by some drywall finishers to be basic needs, just like a pan and knife.

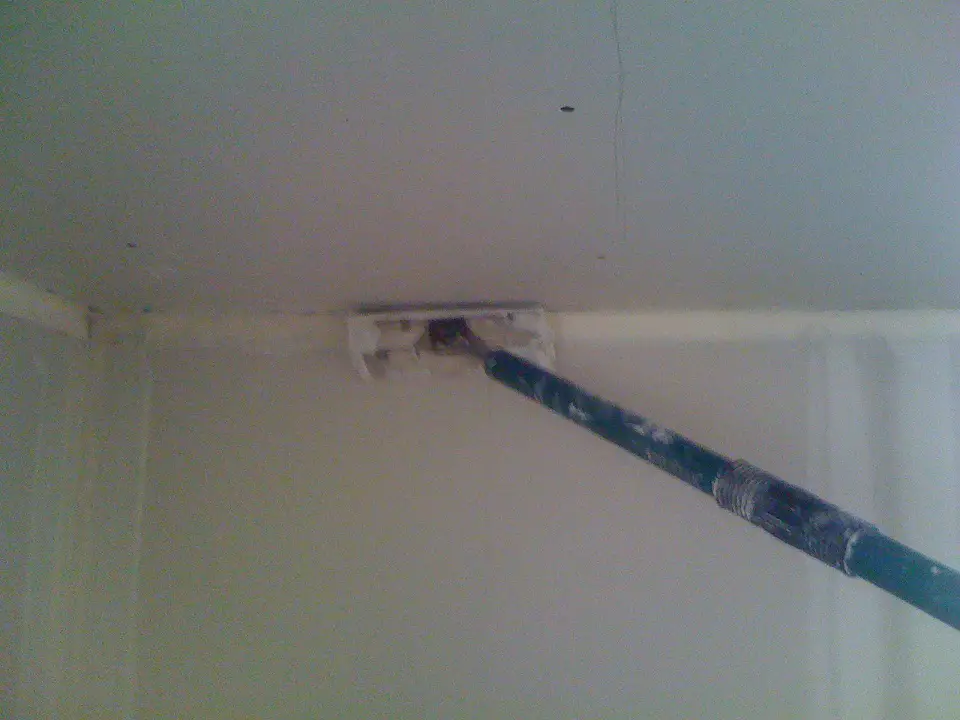
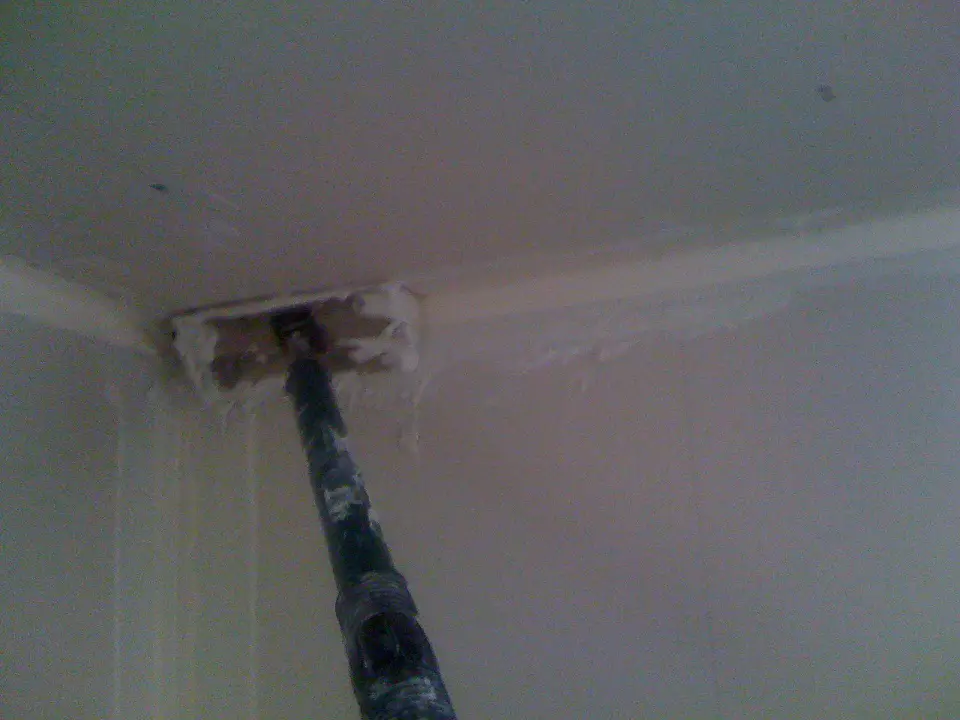
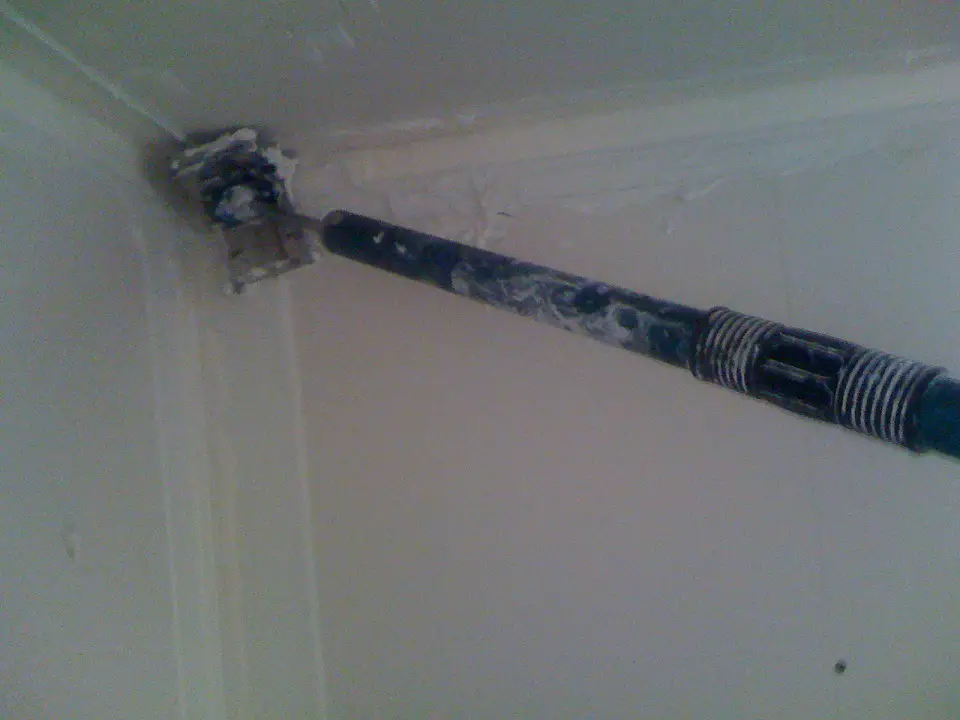
The purpose of an Angle Roller is to embed the paper tape squarely in the corner and squeeze the drywall mud evenly from behind the tape. The Angle Head is used to smooth excess drywall mud and coat the angle evenly. It is also used when applying a second coat of mud over the tape. Because you can only coat one side of an angle at a time by hand, using an Angle Head to quickly coat both sides of the angle cuts out a ton of unnecessary labor and time.
One final tool that is essential, unless you are using a banjo or bazooka to tape the angles, is a Donut Roller. A Donut Roller is very similar to a paint roller made to fit in drywall corners. It can be used to apply mud to the angles much quicker than with a six inch knife. Donut Rollers usually come in two sizes, 3 inches and 5 inches. While it may be tempting to try the 5 inch roller, thinking it will apply more mud and speed up your work, it actually just ends up making a mess. The 3-inch Donut Roller can be attached to an extendable pole so as to reach higher angles.
To use these three specialized tools, you begin by dunking the Donut Roller in a bucket of thinned all purpose drywall mud and roll the mud into the corner. This is much quicker than using a six inch drywall knife to spread mud on one side of the angle at a time. After the mud is applied evenly in the corner with the Donut Roller, you proceed with folding the tape and placing it in the angle. Then, using the Angle Roller and beginning in the center of the angle you gently roll along the tape embedding it into the mud and smoothing the tape into place. After the paper tape has been well set into place with the Angle Roller, you can use the Angle Head to “plow” excess mud from the paper and leave a nice even smooth coat of mud over the entire corner. All that is needed is to touch-up the corners where three angles come together or where the angle head was unable to reach.